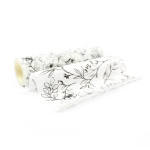
Artist Marker Colored Washi Tape Cards
by Lydia Evans May 23, 2019

Hi friends, Norine here again with a fun technique that turned out as well as I was hoping! Last January, when I first saw the Botanical Rhapsody Washi tape, I knew immediately that I wanted to try coloring it with the alcohol-based Artist Markers! I am not disappointed!

 For the first card, I simply covered an A2-sized panel of cardstock with the washi tape, adjusting the placement to provide the most variety of flowers. I used the Shades of Purple marker set for the large purple blooms, Caramel Toffee and Buttercream for the peach-colored flowers and shades of the Red Cosmos marker set for the pink blooms.
 For the leaves, I varied colors from the Green Fields set with a little bit of blue (Ocean Waves) from the Cool Summer Night Marker set. I found coloring on the smooth surface of the washi tape to differ from coloring on cardstock in one minor way. I started by laying the darkest color down in the areas I wanted most shaded, and then coloring the lightest color right up to the darker shade only letting the colors blend a very little bit. I found that if you color as you would on cardstock, by mixing the shades a lot, the lighter shade very quickly became overwhelmed and the color all turned to one flat single middle shade.
 After coloring the base colors, I sometimes went back and added more definition with the darker markers again.
Once I was finished with the coloring, I trimmed the card panel down and adhered it to a grey cardstock card base. I used the same gray cardstock to stamp a sentiment from the Bold Bunch stamp set with black ink and clear embossing powder. Next, I popped up the sentiment with foam tape and laid a nest of black thread underneath. Then, as ever, a few enamel dots to finish.

 The next two cards are similar in technique, and coordinating in style. After covering several more card panels with the Botanical Rhapsody washi tape, and coloring the individual blooms and leaves on each, I put my feet up, got on the phone with a friend and spent a few minutes fussy cutting the colored images.

 Next, I mixed and matched and shifted and shuffled all the various leaves and blooms components until I was happy with each card arrangement. I used some coordinating patterned papers from my stash for the backgrounds and created sentiments a couple of different ways. I used the Dainty Swiss Dots stamp set for the stamped “best wishes” sentiment, and die cut the “congrats” sentiment from the Signature Words die set.

 Today's ideas are another quick and easy way to get some cards made, and it's very fun to stretch your supplies in this way! I hope you'll give it a try, and post your results with the Altenew hashtag (#Altenew) so we can see your beautiful creations! Enjoy the rest of your day!
~SUPPLY LIST~
|