August 2019 Guest Designer: Hussena Calcuttawala

Hello, Altenew friends! Welcome to our August 2019 Guest Designer post. We have the super talented Hussena with us today. We are pretty sure you're all familiar with her work by now! She's been showering us with her creativity and gorgeous projects and she's also a regular guest in our release blog hops! If you want to see more of her work, feel free to check out her blog. You can also have a quick look through her Instagram feed.
Get to know Hussena!

Hello, crafty friends!
This is Hussena Calcuttawala and I am so excited and honored to be here as a Guest Designer for Altenew this month! I reside in Kolkata, India and am a stay at home mom to two kids. I started my crafting journey around eight years ago when I came across Paper Quilling on the Internet. Since then, I have tried my hands at various papercrafts like Punch Craft, Flower Making, and Card Making, with the latter being my current love. Besides crafting, my other big passion is reading. I enjoy all genres of books but have to confess that suspense thrillers always get me hooked more.
Let's check out her projects!
I’ve created four cards to show you different ways to use your layering stamps and dies. For my first card, I used the Garden Picks 3D Die Set, Watercolor Stripes Cover Die, and the Layered Floral Elements Die Set.

To create my card, I first die cut the different flowers from the Garden Picks 3D Die Set from Watercolor Cardstock. Then, I colored all the different layers using Watercolor Brush Markers from the Tropical Fiesta Set. The Watercolor Brush Markers are so rich and vibrant in color that a little goes a long way! I used a diluted version of Purple Wine and Crimson for the flower petals and Sweet Leaf and Lime for the leaves. After all the die-cuts had dried, I assembled them together.

I am a sucker for foliage and love how the Garden Picks 3D Die Set offers so many possibilities! I die cut a few flowers and extra foliage from the Layered Floral Elements Die Set as well and colored the pieces using the same colors that I had used for the bigger flowers and leaves. The elements in these sets coordinate so well with each other.

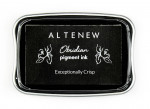
The only stamping that is present on this card is in the form of the stamped sentiment which is from the Magnolias For Her Stamp Set. I stamped it on a strip of white cardstock using the Obsidian Pigment Ink, which has become my absolute favorite ink to use these days. The stamped impressions with it are so clean and crisp!

I wanted to do something different and striking for my card background, so I die cut the Watercolor Stripes Cover Die from Watercolor Cardstock and placed it horizontally on my card base. I colored the stripes in between the watercolor stripes using the Fresh Lemon Brush Marker from the Tropical Fiesta Set.

I die cut an oval from the Create-A-Wreath Die Set from White Glitter Cardstock and adhered all my flowers and foliage around this frame with the help of foam dots. I adhered my sentiment banner in the center of this frame and my card was done. For the finishing touches, I added some clear sequins and black paint splatters to my card panel.
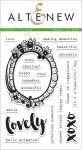
The second card features the Sweet Rose Bouquet Stamp Set, Create-A-Wreath Die Set, and Script Words Die Set.

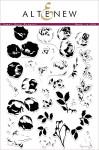
To create this card, I started by stamping the different roses from the Sweet Rose Bouquet Stamp Set on a piece of 4.25″ x 5.5 ” White Cardstock. I used the Red Sunset Oval Set for the roses and for the leaves, I used the Tropical Forest Oval Set. This is a fairly easy layering stamp set and it didn't take me too much time to align the layers together.

Once I was done with all the stamping, I die cut an oval frame from the Create-A-Wreath Die Set and adhered it over my stamped panel. I used foam tape while adhering it for added dimension.

I didn't want to take away the focus from the background and hence kept the rest of the card simple. I used the Script Words Die Set to die cut the word ‘Hugs' from white cardstock. I die cut it from fun foam as well so that I could adhere the white die-cut piece over the fun foam piece to achieve a raised effect. I tend to do this a lot when adhering die-cuts in order to ensure that the pieces have a uniform dimension. The other part of my sentiment comes from the Sweet Friend Stamp Set. I heat-embossed it using the Pure White Crisp Embossing Powder on a strip of black cardstock.

I matted this panel onto another layer of cardstock which was then adhered to an A2 sized top-folding card base. I added some clear sequins and white and pink black paint splatters to complete my card.
The third card I have made showcases the Floral Art Stamp Set and the Best Mom Stamp Set.

I find the Floral Art Stamp Set really elegant and wanted to use it in a way which would highlight the gorgeous stamp layers. For my card, I first started by stamping the different layers of the large flower using Jet Black, Pink Pearl, and Coral Bliss inks. I also stamped some leaves using Bamboo Crisp Dye Ink using stamps from the same set.

Next, I stamped the floral image from the Best Mom Stamp Set and colored the flowers and buds using the Coral Berry Artist Marker (Set A). I used only a part of the image for my card as I wanted to use it as additional foliage for my card design. I then die cut the image using the coordinating Best Mom Die Set. I also die cut three flowers from the Layered Floral Elements Die Set and colored them using the Coral Berry Artist Marker to match with the colors of my card.

The sentiment is also from the Best Mom Stamp Set. I find that it is really meaningful and so apt to use for several occasions. I heat-embossed it using the Pure White Crisp Embossing Powder on a strip of black cardstock. I added a thin strip of Silver Glitter Washi Tape to the sentiment piece for added interest.
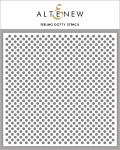
 I kept the background for this card really simple. I dry embossed the background using the Feeling Dotty Stencil. Then, I lightly colored the embossed dots using the Limestone Crisp Dye Ink. Next, I adhered all the stamped images except the leaves using foam tape on my card panel. For the finishing touches, I added some Black Nuvo Drops and black paint splatters to the background. Finally, I mounted this to an A2 sized top-folding white card base and my card was complete.
 My final card features the Beautiful Peony Stamp Set, Cube Cover Die, and Spring Shower Cover Die.

To start off, I stamped several peony flowers and leaves from the Beautiful Peony Stamp Set using Embossing Ink. I used the Pure White Crisp Embossing Powder to heat emboss them in white and then die cut them out using the coordinating Beautiful Peony Die Set. I colored the flowers using the Crimson Brush Marker and leaves using a combination of Sweet Leaf and Lime. The Brush Markers are very concentrated, so while coloring, I mixed the colors with a lot of water to achieve a lighter hue.

Next, I die cut the Spring Shower Cover Die from white cardstock and used the leftover die-cut pieces as foliage for my card. I colored the leaves also using the Sweet Leaf and Lime Brush Markers from the Watercolor Brush Markers – Tropical Fiesta Set.
 I wanted to include some texture on my background, so I used the Cube Cover Die to emboss the panel. To do so, I simply added an Embossing Tan Mat while running it through my die cutting machine so that it wouldn't cut the panel and just emboss it. Once it was embossed, I used the Limestone Crisp Dye ink to lightly color the background, making sure to add only a tinge of color so that the coral flowers would pop against it. I placed my flower arrangement on this panel and adhered them down.

For the sentiment, I used the Hope Die Set to die cut the word ‘Hope' from white cardstock. I colored it using the Crimson Brush Marker from the Watercolor Brush Markers – Tropical Fiesta Set. The second part of my sentiment comes from the Hope Stamp Set. I stamped it using Obsidian Pigment Ink on a strip of white cardstock.

As usual, I added some clear sequins and gray and coral paint splatters to complete my card design. I then mounted this panel on to an A2 sized top-folding white card base.
That’s it from me for today! Huge thanks to Altenew for having me as a guest today. Thanks to you all, crafty friends, for looking! Hope I was able to inspire you with my cards.
~Hussena
Hussena's cards are all breathtakingly gorgeous, we cannot pick a favorite! Which one caught your eye? Comment below! Thank you for being our August 2019 Guest Designer, Hussena!
You can find more of her work on her blog and Instagram. Don't forget to leave her some love in the comment section below!
Thank you for stopping by!
~SUPPLY LIST~
|