Creative Coloring with Erum: Stamp Focus: Pen Sketched Flowers
by Erum Tasneem August 12, 2019

Hello! Erum here with a Stamp Focus post featuring the Pen Sketched Flowers Stamp Set. I am sharing two videos today (for the first and the last card) so make sure to check them out!

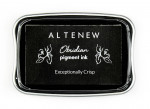
To start, I masked off the edges. Next, I proceeded to ink the top half of the panel with Volcano Lake Crisp Dye Ink and the lower half with Bamboo Crisp Dye Ink. After this, I stamped the images with Obsidian Pigment Ink.

Next, I used the Tropical Forest collection of Artist Markers to color the green bits and Mountain Mist Artist Marker to color the flowers. I also used the Bamboo Artist Marker to color the center of the flowers.

To add faux dimension, I used a black Prismacolor pencil and a blending stump and added a bit of shadow to the images. To finish, I added black paint splatters and stamped the sentiment. This is a one layer card but the masking off of borders and the addition of shadows added quite a bit of faux dimension to the panel.
You can check out the process video for the card above on Youtube or below.

I kept my second card super simple. I used the Antique Gold Pigment Ink to stamp an image on a piece of black cardstock. Next, for the splatters, I used the same ink mixed in water which resulted in very muted splatters so I also added a few splatters from this gold paint I have.

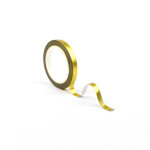
For the gold matting, I used the Golden Trim Washi Tape and adhered it on the edges of a kraft cardstock. I adhered the black stamped panel onto the kraft panel with foam tape and then adhered the entire piece onto the card base.
As you can see, this was a quick and easy card and it also turned out very elegant looking.

For the third card, I stamped the image onto Classic Crest Solar White Cardstock with Permanent Black Ink. I used Mango Smoothie and Cotton Candy Artist Markers in a flicking motion to fill in the petals. And, to soften the edges of the flicks, I used the Colorless Blender. Once the image was colored, I used the coordinating dies to die cut it and set it aside.

For the card front, I used the die-cut as a guide to stamp more leaves in the background. To color the leaves, I used the Green Fields set of Artist Markers. Next, I added black paint splatters and glued down the die-cut. Finally, I stamped a sentiment and adhered it on the card front with foam tape.
You can watch the process video for the card above on YouTube in HD or below.
~SUPPLIES~
|