One Layer Stamping and Artist Marker Coloring Video Tutorial – Creative Coloring with Erum
by Erum Tasneem October 14, 2019

Hello! Erum here today with a one-layer card featuring the Spring Daisy Stamp Set.

I started by stamping the larger of the two daisies and then masked it off. Next, I stamped the second daisy and masked it off as well. After this, I stamped the leaves and then removed my masks. To balance the stamped images, I also stamped a separate bud and drew the stem freehand.

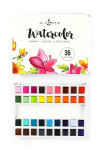
Once the images were stamped, I started to add a light color wash of Frayed Leaf Watercolor from Altenew's Watercolor 36 Pan Set. Since this panel is a Classic Crest Solar White Cardstock, I was careful as to how much water I was adding to it. After coloring the panel, I heat set it.
For the flowers, I used the oranges from the Artist Markers Set E. Since I was doing color glazing, I started from light to dark and then went back in the end with the lightest marker to blend all the layers together. The greens for the leaves are also from the same set.
I also added a shadow around the image and for that, I used the grays from the same set.

To color the flower center, I used Citrus Burst and Warm Sunshine Watercolors.
To add interest, I added splatters of different sizes and concentrations of Frayed Leaf Watercolor. Next, I added fine black splatters as well.

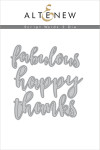
For the sentiment, I adhered the word “thanks” on a strip of black cardstock, this is from Script Words 2 Die Set.
You can watch the video below or on YouTube in HD.
Hope you enjoyed this one layer stamping and Artist Marker coloring technique!
~SUPPLIES~
|