

How-to Video: August 2019 Inspiration Challenge with May Sukyong Park
by Lydia Evans August 3, 2019

 Hello, crafty friends. It’s May here today hosting the August 2019 Inspiration Challenge. My inspiration came from a beautiful photo that Jennifer McGuire shared on her Instagram Story last month.
 I just loved the flower arrangement on her plant pot and every color on her photo. So I asked her to send me the photo so I can use it for my inspiration. Make sure to watch my video tutorial to see her full photo.
Video Tutorial
I made a video tutorial to show you how to create a one layer watercolor card from start to finish. You can watch it above or in HD on YouTube.
This video includes:
- Techniques: watercoloring, masking, watercolor wash background, dotting.
- Why I chose a specific supply – stamps, paper, and etc.
- How I decided on my card design and changed it along the way.
- How I chose colors for my coloring project.
- How I proceeded with my project when I make a mistake.
- How to add interest and depth to your watercolor images.
- My craft desk after my project was done – I hope you can relate to my messy desk.
- And more!
 To create my own floral arrangement, I mixed several images from some of my favorite Altenew stamp sets.
- Flowers: Adore You, Build-A-Flower: Coral Charm, Beautiful Day
- Plant pot: an oval vase image from the Versatile Vases Stamp Set
- Sentiment: Beautiful Day Stamp Set
- Message inside the card: Beautiful Inside Stamp Set
 For my watercolor card, I started by stamping a large floral image from the Adore You Stamp Set with Permanent Black Ink (which is waterproof) on the bottom of my A2 size cold press watercolor paper.
Then I masked off the flower with a full adhesive post-it note and stamped the additional flowers and leaves, making sure that the main flower image appeared on the foreground and the rest of the images were stamped partially behind the flower. Lastly, I stamped the plant pot after masking off the leaves and small flowers.
 After stamping, I watercolored my images using the Watercolor 36 Pan Set and #3 watercolor paintbrush. My go-to paintbrush size is #3 as it’s easy to add details while allowing me to cover the quite large areas as well. I think #3 or #4 round paintbrush should be good enough for painting images when you make an A2 size card project.
 Next, I coated a thin layer of light pigment and applied darker colors toward the bottom of each petal and the areas where two petals meet together to indicate the shading areas.
I worked on small areas at a time and painted slowly with light pressure on my hand. To create a gradient look of the color, it’s important to rinse off your paintbrush with clean water and wipe off the excess paint using a towel in between before you pull out the color. I used a heat tool between applications to speed up the drying time.
 As a finishing touch, I applied a thin layer of Fresh Lemon Ink on the flowers using a watercolor glazing technique. Then I lightly colored my background using a watercolor wash technique to set my scene. I loaded lots of water on my watercolor paintbrush as I didn’t want to create intense colors.

To add extra dimension and depth to my images, I added some tiny dots on my flowers/leaves/plant pot. I also added dots on the center of each flower using a white gel pen to add interest.
FYI, here is the list of paint colors I used for my watercoloring:
- Flowers: Puffy Heart, Purple Wine, Coral Berry, Rubellite, Fresh Lemon
- Leaves: Bamboo, Frayed Leaf, Forest Glades, Evergreen
- Plant pot: Lagoon, Emerald, Ocean Waves, Paper Bag
- Background: Paper Bag, Industrial Diamond
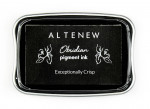
 After my coloring was done, I stamped the sentiment from the Beautiful Day Stamp Set on the right bottom side of my card front with my favorite black ink which is Obsidian Pigment Ink.
 Actually, I had to start over my watercolor card as I didn't like my first attempt at all. I'm still not sure if I like the final result of my card. I have mixed feelings about my watercoloring. Let me know what you think. My husband loved my card so much, which is rare. Haha!
It's a mystery that I have a different result every time I create a watercolor card even though I use the same technique. Sometimes it turns out beautifully and sometimes not. Leave a comment below if you can relate to this.
The beauty of my one layer watercolor card is an illusion of depth created by the masking technique. If you are not good at masking technique, I highly recommend that you test out your placement of each image by stamping the images on an A2 size scratch paper. That way you’ll know which image you should stamp first to place it in the foreground.
That is it for today! I hope my watercolor card inspired you to play along with this month's challenge. Happy crafting!

~SUPPLY LIST~
|



 Make a card, a tag, a layout or any other project based on the inspiration photo above. You may use either the colors, the composition, the elements, the texture or any combination to create your project.

- Altenew products should be the focus, but other companies’ products can be used.
- Make sure to use our challenge image above in your blog post.
- Include a link back to the ALTENEW INSPIRATION CHALLENGE POST.
- When uploading your project, make sure you link your entry post, not your entire blog.
- You may enter as many times as you wish!
- Challenge ends on August 31st, 2019, at 11:59 PM EDT.

After the challenge ends, FOUR WINNERS will be selected. Each will receive a $30 gift certificate to spend at www.altenewsnap.com.

Winners will be announced on 9/8/2019. WAIT – there’s more! If you use #AltenewChallenge when you share your challenge entry on social media, you are instantly entered into a raffle to win a $15 gift certificate to our online store!

Feel free to use the banner above and let everyone know that you are participating in our Inspiration Challenge!
 Please click on the blue button below to link your challenge entries. We cannot wait to see where this month’s inspiration takes you! Good luck and happy crafting!