VIDEO: Lydia’s Crafty Corner – Light & Dark Stenciled Backgrounds
by Lydia Evans June 21, 2019

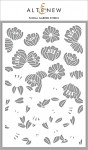
Hello there everyone! Lydia here. Today I'll be sharing a few cards that show different looks. Just by switching out the background color, the Floral Garden Stencil can have a very different feel.
 I started by placing the Floral Garden Stencil onto a 5 1/2″ x 8 1/2″ piece of Classic Crest Solar White Cardstock. Then I added color using finger daubers. For the flowers, I used Rouge Ink, then Honey Drizzle Ink for the stamens, and Olive Ink for the leaves. I left the stencil in place and wiped off the excess ink before adding Embossing Ink over all of the images. After removing the stencil, I then added over Crystal Clear Embossing Powder and heat set. After cleaning the stencil, I turned it around and did the same technique to cover the whole piece with a beautiful pattern.
 To create two different looks using the same piece, I cut the piece in half and inked over one of the 4 1/4″ x 5 1/5″ panels using Galactic Stream Ink. I then cut these panels at 3″ so I had more to play with. For the cards above, I simply added the 3″ x 4 1/4″ panel to a card base and added a sentiment strip using Sentiment Strips Stamp Set.
 Then I went a little further with the two remaining panels. I used Bold Alphabet Die Set to cut the word ‘hugs' into both of the panels. Then I added the die-cut panels onto a card base using glue tape and then added in the letters from the other panel. I just love how this looks. Again, I finished with a white embossed sentiment on a Jet Black Cardstock strip using Sentiment Strips Stamp Set.
Check out the video below to see how these cards came together or over on our YouTube Channel:
Thanks so much for stopping by!
~SUPPLY LIST~
|