Watercolor Painting with Pen Sketched Flowers
by Lydia Evans July 28, 2019

Hello Altenew friends! Norine here, back again with a couple of cards I've made and want to share with you, using the Pen Sketched Flowers Stamp and Die Bundle as well as a few other stamp and die sets.
I've used several easy, uncomplicated techniques that give big impact for little effort, so let's get started!
 To begin, I stamped images from the Pen Sketched Flowers Stamp Set onto watercolor paper, with embossing ink and heat embossed with white embossing powder. Then I die cut them with the coordinating dies.
 I used the Altenew watercolor pans to paint the leaves and blooms of the Pen Sketched Flowers Stamp Set, using a mix of reds for the flowers and greens for the leaves. To paint them, I used a clean, wet brush to “paint” in each section. Before that water dried, I touched the wet brush tip to the paint pans to pick up pigment and touched them down into each section at the darkest/shaded point and let the paint wick out naturally. Then, I cleaned my brush and went back to that painted section and dragged some of the pigment out towards the edges. And finally, before all of that was dry, I quickly touched a little more paint (usually a slightly different shade of color) back into the darkest corners of the petal or leaf and let it blend and dry.
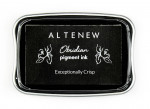
 To create the card, I used one of the Nesting Label dies to die cut the sentiment label out of an A2-sized watercolor card panel, making sure to place the die where I ultimately wanted the sentiment label to sit. And then I stamped the sentiment from the Pen Sketched Flowers Stamp Set, with Obsidian Pigment ink. Then I cut two more labels from more watercolor paper and stacked them all together. Finally, I ran the watercolor card panel (minus the label die-cut) through a polka-dotted embossing folder and trimmed all four edges by 1/8 inch.
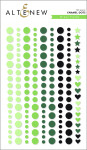
I adhered the stamped sentiment label stack back into its opening in the polka-dotted cardstock and then adhered the painted and dried die-cuts on and around the stacked label. Then a few little matching Red Cosmos Enamel Dots complete the card.
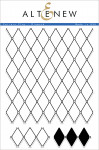
 For my second card, I used the Pattern Play Diamond Stamp Set to stamp all over another A2-sized piece of watercolor paper, stamping with embossing ink and heat embossing with white embossing powder. Using the same colors of paint that I used for the flowers, I painted over the diamond design with varying amounts of paint and water. Because the embossed lines formed somewhat of a barrier to liquid paint, I stood the cardstock up on its bottom edge and let the paint run down and dry more heavily pigmented towards the bottom of some sections. I re-applied more paint in some spots as the paint dried and lightened. And I added some paint speckles to the background piece and let it dry.
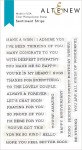
 For the sentiment on this card, I stamped one of the stamps from the Sentiment Strips Stamp Set onto watercolor paper, with Obsidian Pigment Ink, then trimmed it down to a narrow strip. And then I used some leftover painted leaf die-cuts from this project back here using the Virginia Rose 3D dies and tucked them in and around the stamped, heat-embossed and painted flowers from the Pen Sketched Flowers Stamp Set. A few matching enamel dots completed this card as well and, as easily as that, two cards are added to the stash!
I hope you enjoyed this basic tutorial and found some inspiration to create something of your own! Thank you for stopping by and have a wonderful day!
~SUPPLY LIST~
|